Buffalo LS-WVL
Buffalo LS-WVL
- LS-WVL 安裝 Debian12
- LS-WVL Debian 安裝後選項
- LS-WVL Linux使用LSUpdater更新
- LS-WVL 使用NUT (Network UPS Tools)監控UPS
- LS-WVL 透過Synology排程使用SMART抓取硬碟資訊
LS-WVL 安裝 Debian12
下載檔案
1.acp_commander安裝
準備一台已經運行原廠Buffalo的LS WVL設備
將initrd.buffalo和uImage.buffalo複製到acp_commander.jar同目錄
運行指令尋找設備IP
java -jar acp_commander.jar -f複製安裝檔到設備
java -jar acp_commander.jar -t <device ip address> -pw <your admin password> -xfer initrd.buffalo -xferto /boot/
java -jar acp_commander.jar -t <device ip address> -pw <your admin password> -xfer uImage.buffalo -xferto /boot/
重啟設備
java -jar acp_commander.jar -t <device ip address> -pw <your admin password> -c reboot2.分區安裝
將硬碟插入Linux後分區丟入安裝檔
$parted /dev/sdb

(parted) mklabel gpt

(parted) mkpart boot 2048s 1024MiB

(parted) mkpart root 1024MiB 6144MiB

(parted)quit
$mkfs.ext3 /dev/sdb1
$mount /dev/sdb1 /mnt
將檔案放入/mnt
$umount /mnt將硬碟放入NAS第一盤位
開始安裝
找尋設備IP後SSH進入安裝,使用者名稱是installer,密碼是install
ssh installer@IP建立RAID 1
兩顆硬碟分別建立分區1(RIAD)分區2(RAID)分區3 SWAP
進入SoftRAID選項後,開新視窗進入shell
第一分區為/boot 需要metadata=0.90才能啟動
# mdadm --create /dev/md0 --level=1 --raid-devices=2 \
--metadata=0 /dev/sda1 /dev/sdb1
第二分區使用GUI建立即可
RAID1 #1 檔案類型ext3 掛載/boot
RAID1 #2 檔案類型ext4 掛載/
SWAP不用做RAID 1
調低其餘RAID重建速度避免影響Debian安裝
# echo 100 > /sys/block/md{1,2,3}/md/sync_speed_max重啟後即恢復
mdadm預設會於每個月的第一個星期日 01:00做 array scrubbing 檢查
jason@LS-WVL885:~$ cat /usr/lib/systemd/system/mdcheck_start.timer
[Unit]
Description=MD array scrubbing

[Timer]
OnCalendar=Sun *-*-1..7 1:00:00

[Install]
WantedBy= mdmonitor.service
Also= mdcheck_continue.timer
使用此項目安裝https://github.com/1000001101000/Debian_on_Buffalo
LS-WVL Debian 安裝後選項
Triggerhappy 按鈕
apt install triggerhappy監聽按鈕
thd --dump /dev/input/event* 建立關機功能
echo "SW_LID 0 poweroff" > /etc/triggerhappy/triggers.d/gpf.conf修改/lib/systemd/system/triggerhappy.service,把ExecStart user的nobody改成root,不然無權限執行poweroff
ExecStart=/usr/sbin/thd --triggers /etc/triggerhappy/triggers.d/ --socket /run/thd.socket --user root --deviceglob /dev/input/event*重啟加載配置
systemctl daemon-reload
systemctl restart triggerhappy
即可按鈕實現關機
風扇控制
風扇狀態/sys/class/thermal/cooling_device0/cur_state
CPU溫度/sys/class/thermal/thermal_zone0/temp
安裝smartmontools
apt install smartmontools硬碟溫度/usr/sbin/smartctl -a -d ata /dev/sda | grep -m 1 Temperature | awk '{print $10}'
風扇自動化腳本
#!/bin/bash
timestamp=$(date "+%Y-%m-%d %H:%M:%S")
# CPU溫度
cpu_temp=$(< /sys/class/thermal/thermal_zone0/temp)
cpu_temp=$(( cpu_temp / 1000 ))

# 硬碟溫度
hdd_temp=$(/usr/sbin/smartctl -a -d ata /dev/sda | grep -m 1 Temperature | awk '{print $10}')

echo "[$timestamp] CPU Temperature: ${cpu_temp}C"
echo "[$timestamp] HDD Temperature: ${hdd_temp}C"

# cpu偵測
if [ "$cpu_temp" -gt 60 ]; then
    echo 0 > /sys/class/thermal/cooling_device0/cur_state
elif [ "$cpu_temp" -gt 55 ]; then
    echo 1 > /sys/class/thermal/cooling_device0/cur_state
elif [ "$cpu_temp" -gt 50 ]; then
    echo 2 > /sys/class/thermal/cooling_device0/cur_state
elif [ "$cpu_temp" -lt 50 ]; then
    echo 3 > /sys/class/thermal/cooling_device0/cur_state
fi

# HDD溫度偵測
if [ "$hdd_temp" -gt 45 ]; then
    echo 0 > /sys/class/thermal/cooling_device0/cur_state
elif [ "$hdd_temp" -gt 40 ]; then
    echo 1 > /sys/class/thermal/cooling_device0/cur_state
elif [ "$hdd_temp" -gt 35 ]; then
    echo 2 > /sys/class/thermal/cooling_device0/cur_state
elif [ "$hdd_temp" -lt 35 ]; then
    echo 3 > /sys/class/thermal/cooling_device0/cur_state
fi
# 風扇狀態偵測
fan_state=$(< /sys/class/thermal/cooling_device0/cur_state)
echo "[$timestamp] FAN_State : ${fan_state}"
root@LS-WVL885:~# bash temp.sh
[2025-08-23 11:47:00] CPU Temperature: 55C
[2025-08-23 11:47:00] HDD Temperature: 37C
[2025-08-23 11:47:00] FAN_State : 2
#狀態
0 高速
1 中速
2 低速
3 停止使用CRONTAB每分鐘執行腳本並寫入LOG
* * * * * /bin/bash /root/temp.sh >> /root/temp.log 2>&1
LED控制
關閉LED藍燈echo 0 > /sys/class/leds/linkstation\:blue\:power/brightness
開啟LED藍燈echo 1 > /sys/class/leds/linkstation\:blue\:power/brightness
LS-WVL Linux使用LSUpdater更新
LSUpdater為windows軟體,要在Linux使用需安裝wine和x11轉發
LSUpdater為32位元,需載入i386多重架構
dpkg --add-architecture i386
apt update
apt install wine32:i386
root@x11:~# dpkg --print-foreign-architectures
i386wine LSUpdater.exe x11即可跳出視窗程式
若wine有錯誤則重置設定
rm -rf ~/.wine
winecfg
移除i386架構
apt remove `dpkg --get-selections |grep :i386 |awk '{print $1}'` --allow-remove-essential -f

dpkg --remove-architecture i386

dpkg --print-foreign-architectures 無顯示i386
LS-WVL 使用NUT (Network UPS Tools)監控UPS
運行環境
- LS-WVL刷Debian 12
安裝套件
apt install -y nut設定
編輯/etc/nut/nut.conf ,修改MODE=netclient,確認權限為root nut
none: Nut 未設定
standalone: 獨立模式, 一般在只有一個 UPS 且只負責本地系統(不提供網路服務)的情況下使用.
netserver: Nut Server.
netclient: 客戶端模式, 只啟動 nut-monitor, 用於連接遠端的 Nut 服務.
root@LS-WVL885:~# cat /etc/nut/nut.conf
...
MODE=netclient編輯/etc/nut/upsmon.conf,以下範例為當UPS切換到電池後執行upssched調度程序,,確認權限為root nut
#監控的UPS IP 使用者及密碼,模式為slave
MONITOR ups@192.168.1.1 1 monuser secret slave

#系統最少需要多少台 UPS ,通常單一 UPS 系統設1
MINSUPPLIES 1

#偵測到要關機(如 UPS 電池低、FSD)時,upsmon 執行的指令
SHUTDOWNCMD "/sbin/shutdown -h +0"

#每幾秒輪詢 UPS 狀態
POLLFREQ 5

#在告警(例如 ONBATT)時,每幾秒檢查一次
POLLFREQALERT 5

HOSTSYNC 15
#若 15 秒都收不到 UPS 更新資料,就認為 UPS 通訊掛掉
DEADTIME 15

#當系統真的要「切電源」時,會建立這個旗標檔,UPS daemon 看到它後會通知 UPS 關閉輸出電源。
POWERDOWNFLAG /etc/killpower

RBWARNTIME 43200

#若 300 秒都沒有收到 UPS 通訊,就發出「通訊中斷」通知
NOCOMMWARNTIME 300

#關機流程最後等待的秒數
FINALDELAY 5

#NUT自帶調度程序
NOTIFYCMD /sbin/upssched

#UPS切換電池和恢復供電時皆觸發調度程序
NOTIFYFLAG ONBATT EXEC
NOTIFYFLAG ONLINE EXEC

#UPS無回應或恢復觸發調度程序
NOTIFYFLAG COMMOK EXEC
NOTIFYFLAG NOCOMM EXECupssched程序的設定檔為/etc/nut/upssched.conf,編輯並確認權限為root nut
#自訂執行腳本位置
CMDSCRIPT /bin/upssched-cmd

#確認以下路徑正確
PIPEFN /var/run/nut/upssched.pipe
LOCKFN /var/run/nut/upssched.lock

#當UPS狀態切換後執行參數
AT ONBATT * EXECUTE onbatt
AT ONLINE * EXECUTE onpower
AT NOCOMM * EXECUTE lost
AT COMMOK * EXECUTE connect

#當UPS切換電池後創建shutdown計時器120秒
AT ONBATT * START-TIMER shutdown 120

#當UPS恢復供電後取消計時器
AT ONLINE * CANCEL-TIMER shutdown編輯/bin/upssched-cmd,確認權限為root nut和可執行chmod +x,當切換電池後記錄log並啟動shutdown計時器,120秒UPS未恢復供電則關機
#! /bin/sh
case $1 in
  shutdown)
    echo "$(date): AC Power not restored after 120s, shutting down system." >> /var/log/ups-shutdown.log
    sleep 3
    sudo /sbin/shutdown -h +0
    ;;
  onbatt)
    echo "$(date): AC Power outage, on battery" >> /var/log/ups-shutdown.log
    ;;
  onpower)
    echo "$(date): AC Power restored" >> /var/log/ups-shutdown.log
    ;;
  connect)
    echo "$(date): Communications with UPS established" >> /var/log/ups-shutdown.log
    ;;
  lost)
    echo "$(date): Communications with UPS lost" >> /var/log/ups-shutdown.log
    ;;
  *)
    logger -t upssched-cmd "Unrecognized command: $1"
    ;;
esac使用visudo,加入nut使用者允許使用shutdown指令
root@LS-WVL885:~# visudo

...
nut ALL=(ALL) NOPASSWD: /sbin/shutdown
建立nut程序可寫入log檔
touch /var/log/ups-shutdown.log

chown root:nut /var/log/ups-shutdown.log

chmod 664 /var/log/ups-shutdown.log
systemctl enable nut-monitor
systemctl start nut-monitor測試
測試可讀取UPS狀態
root@LS-WVL885:~# upsc ups@192.168.1.1
Init SSL without certificate database
battery.charge: 96
battery.charge.low: 10
battery.charge.warning: 50
battery.date: 2001/09/25
battery.mfr.date: 2023/08/10
battery.runtime: 2636
ups.status: OL CHRG
ups.test.result: No test initiated
ups.timer.reboot: 0
ups.timer.shutdown: -1
ups.vendorid: 051d
測試UPS切換電池,120秒內未恢復供電則會關機和紀錄log
root@LS-WVL885:~# cat /var/log/ups-shutdown.log
Mon Sep  1 01:11:06 AM CST 2025: AC not restored after 120s, shutting down system.
Mon Oct 20 01:14:56 AM CST 2025: AC Power outage, on battery
Mon Oct 20 01:15:11 AM CST 2025: AC Power restored
UPS無回應和恢復時紀錄log
root@test:~# cat /var/log/ups-shutdown.log
Sun Nov 16 04:52:15 PM CST 2025: Communications with UPS lost
Sun Nov 16 04:52:25 PM CST 2025: Communications with UPS established
LS-WVL 透過Synology排程使用SMART抓取硬碟資訊
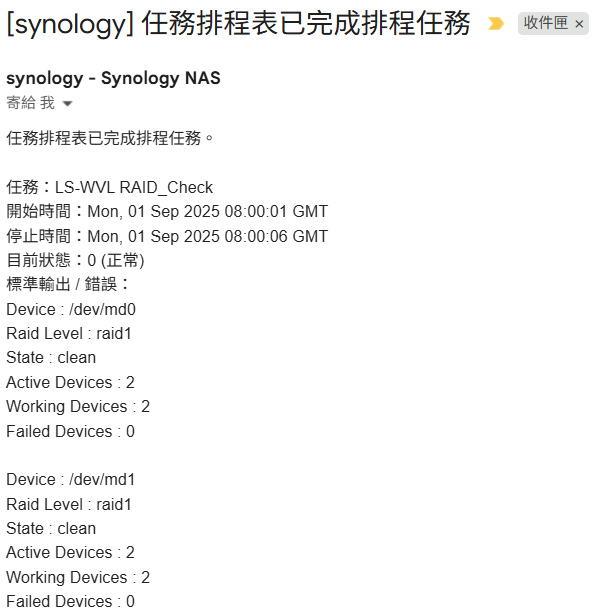
由於不想在LS Debian內直接寄送mail,使用synology內建任務排程登入LS Debian後執行創建好的讀取硬碟bash檔並寄送mail
LS-WVL設定
下載S.M.A.R.T.(硬碟監控)和mdadm(RAID 管理工具)
apt install smartmontools mdadm -y在使用者資料夾內新增執行檔案,以下範例為輸出RAID狀態和硬碟資訊
root@LS-WVL885:~# cat /home/user/raid_check.sh
#!/bin/bash
timestamp=$(date "+%Y-%m-%d %H:%M:%S")

md0_state=$(sudo /usr/sbin/mdadm -D /dev/md0 |grep -e "Raid Level" -e "State :" -e "Active Devices" -e "Working Devices" -e "Failed Devices")
md1_state=$(sudo /usr/sbin/mdadm -D /dev/md1 |grep -e "Raid Level" -e "State :" -e "Active Devices" -e "Working Devices" -e "Failed Devices")
echo "Device : /dev/md0"
echo "${md0_state}"
echo " "
echo "Device : /dev/md1"
echo "${md1_state}"
echo " "
cat /proc/mdstat
echo " "
echo "Hard Disk : /dev/sda"
sudo /usr/sbin/smartctl -H -l selftest /dev/sda
echo "Hard Disk : /dev/sdb"
sudo /usr/sbin/smartctl -H -l selftest /dev/sdb執行visudo增加使用者允許執行mdadm和smartctl指令
root@LS-WVL885:~# visudo
...
user ALL=(ALL) NOPASSWD: /usr/sbin/mdadm -D *, /usr/sbin/smartctl -H * ,/usr/sbin/smartctl -l *
chmod +x /home/user/raid_check.sh確認user使用者可執行
user@LS-WVL885:~$ sh raid_check.sh
Device : /dev/md0
        Raid Level : raid1
             State : clean
    Active Devices : 2
   Working Devices : 2
    Failed Devices : 0

Device : /dev/md1
        Raid Level : raid1
             State : clean
    Active Devices : 2
   Working Devices : 2
    Failed Devices : 0
...
Hard Disk : /dev/sda
smartctl 7.3 2022-02-28 r5338 [armv5tel-linux-6.1.0-38-marvell] (local build)
Copyright (C) 2002-22, Bruce Allen, Christian Franke, www.smartmontools.org

=== START OF READ SMART DATA SECTION ===
SMART overall-health self-assessment test result: PASSED
Please note the following marginal Attributes:
ID# ATTRIBUTE_NAME          FLAG     VALUE WORST THRESH TYPE      UPDATED  WHEN_FAILED RAW_VALUE
190 Airflow_Temperature_Cel 0x0022   059   041   045    Old_age   Always   In_the_past 41 (Min/Max 40/41 #7471)

SMART Self-test log structure revision number 1
Num  Test_Description    Status                  Remaining  LifeTime(hours)  LBA_of_first_error
# 1  Short offline       Completed without error       00%     45817         -
...
Synology設定
先設定SSH KEY 免密碼登入確認synology可直接ssh登入LS WVL
任務排程內新增任務並使用自訂指令並寄送mail
ssh user@192.168.1.1 "sh /home/user/raid_check.sh"